The kitchen is a theater of thermal logistics where the humble ovum reigns as the ultimate currency of convenience. Imagine the roar of a high-pressure burner as it brings a massive stockpot to a violent, rolling boil; this is the sound of efficiency. We are not just cooking breakfast; we are executing a Hard Boiled Egg Batch with the precision of a Swiss horologist. The air carries the faint, clean scent of mineral-rich water meeting calcium carbonate shells. You need a protein cache that stands up to the rigors of a high-volume week. We are talking about yolks that transition from a sunset orange to a creamy, pale gold without a hint of that dreaded sulfurous green ring. This is where the physics of heat transfer meets the biology of protein denaturation. Whether you are fueling a marathon training block or streamlining a commercial salad station, the technical audit of your egg prep is the difference between a rubbery catastrophe and a silky, nutrient-dense masterpiece. Grab your timer and clear the counter; we are going deep into the shell.
THE DATA MATRIX
| Metric | Specification |
|---|---|
| Prep Time | 5 Minutes |
| Execution Time | 12 Minutes |
| Yield | 12 to 24 Servings |
| Complexity (1-10) | 2 |
| Estimated Cost per Serving | $0.25 – $0.40 |
THE GATHERS
Ingredient Protocol:
- 24 Large Grade A Eggs (approx. 1.3kg / 2.8 lbs)
- 4 Liters / 1.05 Gallons Filtered Water
- 30ml / 2 Tablespoons Distilled White Vinegar
- 15g / 1 Tablespoon Sea Salt
- 2kg / 4.4 lbs Ice (for the thermal shock bath)
Section A: Ingredient Quality Audit:
The primary failure point in any Hard Boiled Egg Batch is the age of the raw material. Super-fresh eggs are a nightmare to peel because the alkaline levels in the egg white are lower; this causes the membrane to fuse to the shell. If you find your shells are cratering the whites during peeling, your eggs are too fresh. The technical fix is to purchase your eggs seven to ten days before your scheduled prep. If you are stuck with farm-fresh eggs, increase the vinegar in your boiling water to 60ml. This slightly softens the calcium structure of the shell through a mild acid-base reaction. Additionally, ensure there are no micro-fissures in the shells before they hit the water; a single crack leads to a viscous explosion of albumen that ruins the water clarity and creates "tails" on your finished product.
THE MASTERCLASS
Step-by-Step Execution:
1. The Thermal Foundation
Fill a heavy-bottomed saucier or stockpot with your filtered water and bring it to a full, aggressive boil. Do not add the eggs yet. Adding eggs to cold water and bringing them up together is a recipe for inconsistent timing and fused membranes.
Pro Tip: Use a digital scale to measure your salt and vinegar. The salt increases the density of the water, which helps prevent the eggs from cracking against the bottom of the pot, while the vinegar acts as a coagulant for any whites that might escape a micro-crack.
2. The Controlled Descent
Lower the heat to a simmer and use a slotted spoon or a wire spider to gently lower the eggs into the water. Once all eggs are submerged, return the heat to a medium-high setting to maintain a steady, gentle boil.
Pro Tip: Professional kitchens use a perforated steaming basket to lower an entire Hard Boiled Egg Batch simultaneously. This ensures that the first egg in the pot has the exact same residence time as the last egg, preventing a gradient of doneness across the batch.
3. The Precision Chronometry
Set your digital timer for exactly eleven minutes for a standard hard-set yolk. If you prefer a "jammy" or viscous center, pull them at eight minutes. Maintain a consistent temperature; do not let the water drop below 100 degrees Celsius.
Pro Tip: Use a high-quality infrared thermometer to monitor the surface temperature of the water. Even a five-degree fluctuation can alter the protein structure of the yolk, moving it from creamy to chalky in a matter of seconds.
4. The Cryogenic Shock
While the eggs cook, prepare a large bowl with a 50/50 mix of ice and water. When the timer sounds, immediately transfer the eggs from the boiling water to the ice bath. Let them sit for at least ten minutes.
Pro Tip: This is known as "shocking." It halts the carryover cooking immediately. Without this step, the residual heat will continue to render the proteins, leading to the development of ferrous sulfide; the green ring that signals an amateur prep.
Section B: Prep & Timing Fault-Lines:
The most common human error is the "crowded pot" syndrome. If you layer eggs three-deep, the water temperature will plummet upon entry, throwing your timing into a tailspin. Always ensure a single layer of eggs with at least two inches of water coverage. Another fault-line is the "false boil." Ensure you see large, breaking bubbles rather than small, aerated pinpricks before you start your clock. If your eggs are coming out with off-center yolks, it is likely because they sat in one position in the carton for too long; flip your egg cartons upside down 24 hours before cooking to center the yolk.
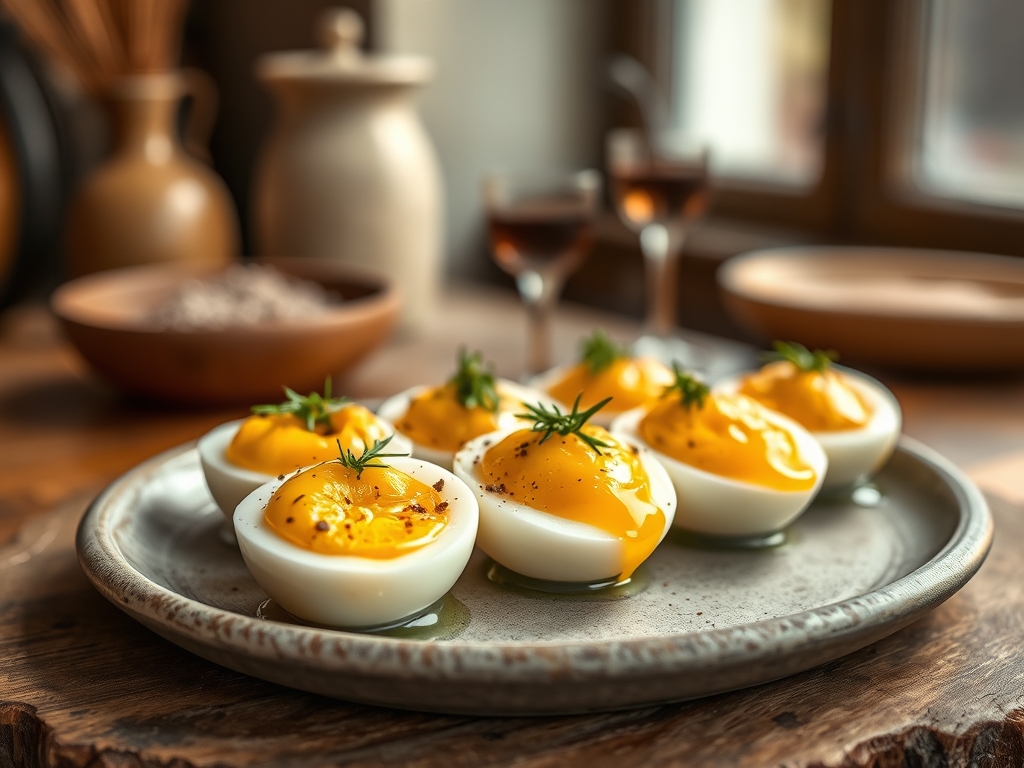
THE VISUAL SPECTRUM
Section C: Thermal & Visual Troubleshooting:
Look at the Masterclass photo above. Notice the pristine, matte white finish of the albumen and the lack of any gray or green discoloration around the yolk. If your whites appear translucent or "snotty," you have under-cooked the batch; the proteins have not fully denatured into a solid lattice. If the yolks are crumbly and pale, you have over-extended the thermal exposure. To achieve that piquant, vibrant yellow, you must hit the eleven-minute mark exactly. If you notice "dimples" at the bottom of the egg, it is an air pocket; you can minimize this by using a thumbtack to prick a tiny hole in the wide end of the egg before boiling, allowing the air to escape and the white to fill the cavity.
THE DEEP DIVE
Macro Nutrition Profile:
A single large egg from your batch contains approximately 78 calories, 6 grams of high-biological-value protein, and 5 grams of healthy fats. It is a powerhouse of choline and leucine, essential for cognitive function and muscle protein synthesis.
Dietary Swaps:
While there is no true vegan "hard boiled egg," firm silken tofu seasoned with kala namak (black salt) can mimic the sulfurous flavor profile. For those on Keto or GF diets, this batch is your gold standard; it is naturally carb-free and gluten-free.
Meal Prep & Reheating Science:
Store your batch in the shell to maintain the internal moisture and prevent the whites from becoming rubbery. If you must reheat, do not use a microwave; the steam pressure will cause the egg to explode. Instead, soak the peeled egg in hot tap water for five minutes to gently infuse heat back into the core without damaging the molecular structure.
THE KITCHEN TABLE
How long do these stay fresh?
In-shell eggs last seven days in a sealed container. Once peeled, consume within 24 hours for optimal texture. Always store at or below 4 degrees Celsius to prevent bacterial growth and maintain the structural integrity of the albumen.
Why is my egg shell sticking?
The pH of the egg white is too low. Older eggs have a higher pH, which weakens the bond between the membrane and the shell. Try adding a teaspoon of baking soda to the water to artificially raise the alkalinity.
Can I bake these in the oven?
You can, but it is technically inferior. Oven "boiling" leads to inconsistent heat spots and often results in brown "burn" marks on the whites. Stick to the water bath for a professional, uniform Hard Boiled Egg Batch every time.
What is the best way to peel them?
Crack the shell all over by gently rolling it on a flat surface using a bench scraper or your palm. Peel under a thin stream of cool running water; the water acts as a lubricant between the membrane and the white.