Forget everything you know about the soggy, uninspired poultry of yesteryear. We are entering the realm of high-velocity thermal dynamics where the humble Air Fryer Chicken Breast is transformed from a bland protein block into a masterpiece of structural integrity. Imagine the sound of a pressurized fan forcing superheated air across a surface tensioned with lipids; the result is a Maillard reaction so aggressive it creates a shatter-crisp exterior while the interior remains a reservoir of succulent juices. This is not just cooking; it is a precision-engineered culinary audit of convection efficiency. We are hunting for that perfect golden-brown hue, that specific resistance against the knife, and the olfactory payoff of toasted spices. If your previous attempts have resulted in something resembling a desiccated sponge, you have suffered a systemic infrastructure failure. Today, we recalibrate. We are going to harness the power of rapid air circulation to ensure every fiber of the bird is perfectly rendered and infused with flavor. Prepare for a total sensory overhaul.
THE DATA MATRIX
| Metric | Specification |
|---|---|
| Prep Time | 10 Minutes |
| Execution Time | 12 to 15 Minutes |
| Yield | 2 Servings |
| Complexity (1-10) | 3 |
| Estimated Cost per Serving | $3.50 USD |
THE GATHERS
Ingredient Protocol:
- 500g / 1.1 lbs Boneless, Skinless Chicken Breasts
- 15ml / 1 tbsp Extra Virgin Olive Oil
- 5g / 1 tsp Smoked Paprika
- 3g / 0.5 tsp Garlic Powder
- 3g / 0.5 tsp Onion Powder
- 2g / 0.25 tsp Dried Oregano
- 5g / 1 tsp Kosher Salt
- 2g / 0.5 tsp Freshly Cracked Black Pepper
Section A: Ingredient Quality Audit:
The primary failure point in poultry infrastructure is moisture imbalance. If your chicken arrives sitting in a pool of purged liquid, the cellular structure is already compromised. This excess moisture prevents the oil from adhering, leading to a steamed rather than fried texture. To fix this, utilize a digital scale to ensure your dry rub ratios are exact; salt is a desiccant that will draw out surface moisture if applied too early, so timing is critical. Furthermore, if the chicken is of varying thickness, the thermal load will be uneven. Use a heavy-duty rolling pin or a meat mallet to achieve a uniform thickness of 2cm across the entire fillet. This ensures that the heat transfer remains consistent across the entire surface area.
THE MASTERCLASS
Step 1: Surface Dehydration and Leveling
Before a single grain of spice touches the meat, you must ensure the surface is bone-dry. Use high-absorbency paper towels to pat the chicken down. Once dry, place the breast on a stable cutting board and use a bench scraper to clear your workspace of any debris. If the breast is excessively large, butterfly it with a sharp chef knife to increase the surface-area-to-volume ratio.
Pro Tip: The science here is simple; water is the enemy of the Maillard reaction. By removing surface moisture, you allow the oil to create a viscous barrier that conducts heat directly to the proteins, initiating browning immediately upon contact with the hot air.
Step 2: Lipid Application and Spice Infusion
In a small stainless steel saucier or mixing bowl, combine your olive oil with the dry spices. Whisk until the mixture is homogenous. Apply this slurry to the chicken, ensuring every crevice is coated. The oil acts as a heat-transfer medium, while the spices provide the piquant aromatic profile that defines high-quality poultry.
Pro Tip: Using a digital scale to measure your spices ensures a repeatable flavor profile. The oil encapsulates the volatile aromatics in the spices, preventing them from burning in the high-velocity air stream and instead allowing them to infuse the meat.
Step 3: The Convection Launch
Preheat your air fryer to 200C / 400F for at least five minutes. This step is non-negotiable. Place the chicken in the basket, ensuring there is no overlap. Overcrowding the basket will cause a drop in air pressure and lead to uneven cooking.
Pro Tip: Air fryers rely on the Venturi effect to move heat. If you block the airflow, you lose the "fry" and end up with a bake. A preheated basket ensures the bottom of the chicken starts searing the moment it touches the metal, preventing sticking.
Step 4: Thermal Monitoring and Resting
Cook for 6 minutes, then flip the chicken using silicone-tipped tongs to preserve the crust. Cook for another 6 to 8 minutes until the internal temperature reaches 74C / 165F. Remove the chicken immediately and place it on a wire rack.
Pro Tip: Use an instant-read probe thermometer to verify the core temperature. Resting the meat for 5 minutes allows the muscle fibers to relax and reabsorb the internal juices, ensuring the liquid stays inside the meat rather than spilling onto your plate.
Section B: Prep & Timing Fault-Lines:
Human error often manifests in the "eyeballing" of temperatures. If your air fryer runs hot, the exterior will carbonize before the interior reaches safety levels. Conversely, if you pull the meat too early, the texture will be rubbery and unappealing. Always use a calibrated thermometer. Another common fault is the "cold start" error; putting cold meat into a cold machine. This results in a long ramp-up time that dries out the exterior. Always allow your chicken to sit at room temperature for 15 minutes before execution to narrow the thermal gap.
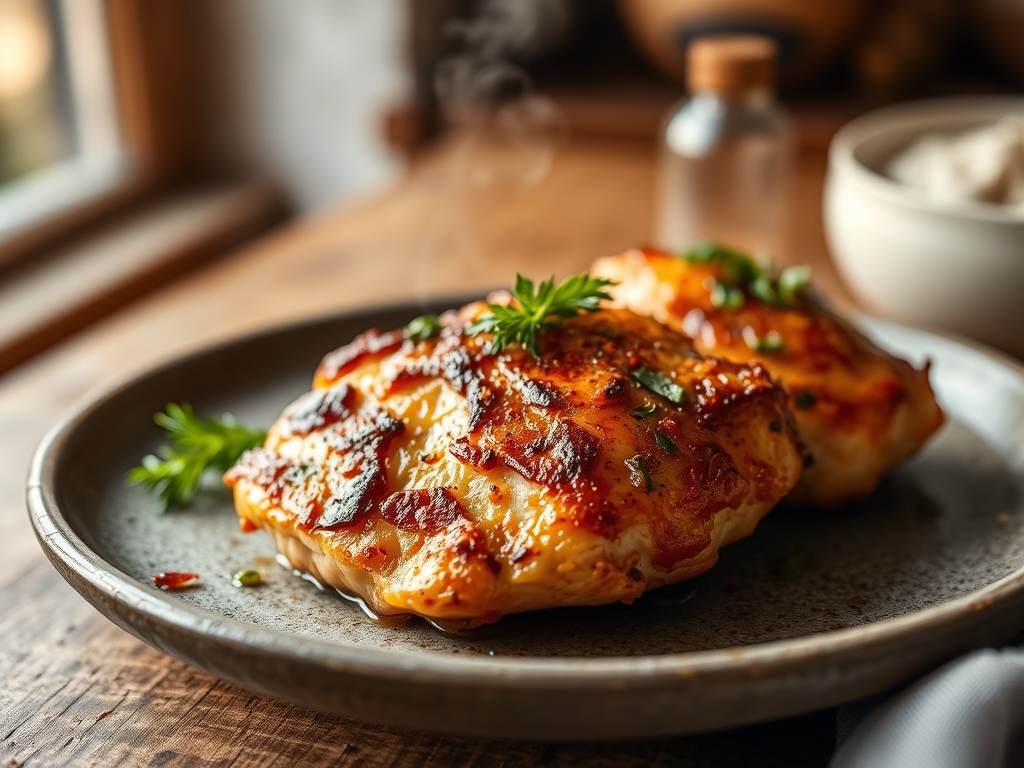
THE VISUAL SPECTRUM
Section C: Thermal & Visual Troubleshooting:
Look closely at the Masterclass photo. You should see a vibrant, mahogany-toned crust with visible flecks of black pepper and herbs. If your chicken looks pale or grey, you likely skipped the preheating phase or used too little oil. If the edges are charred but the center is white, your heat was too high or the breast was too thick. A dull, matte finish indicates that the spices were not properly hydrated by the oil. To achieve that glossy, professional look, you can deglaze the pan drippings with a splash of lemon juice and brush it over the finished product for an extra hit of acidity and shine.
THE DEEP DIVE
Macro Nutrition Profile:
Per serving, this protocol delivers approximately 310 calories, 45g of high-biological-value protein, 12g of healthy lipids, and 0g of carbohydrates. It is a metabolic powerhouse designed for tissue repair and satiety.
Dietary Swaps:
- Vegan: Replace the chicken with extra-firm pressed tofu or seitan steaks. Increase the oil slightly to compensate for the lack of natural fats.
- Keto/GF: This recipe is natively Keto and Gluten-Free. To increase fat content, swap the olive oil for avocado oil or melted ghee.
Meal Prep & Reheating Science:
To maintain the molecular structure during reheating, avoid the microwave. The microwave agitates water molecules, leading to "steaming" from the inside out which toughens the protein. Instead, use the air fryer at 175C / 350F for 3 to 4 minutes. This will aerate the crust and gently warm the center without overcoating the fibers.
THE KITCHEN TABLE
Why is my chicken breast always dry?
You are likely overcooking it or failing to rest the meat. Use a thermometer to hit exactly 74C / 165F. Resting allows the juices to redistribute, preventing the "dry" sensation during consumption.
Can I use frozen chicken?
Technically yes, but it is an infrastructure nightmare. Frozen chicken releases massive amounts of water as it thaws, ruining the Maillard reaction. Always thaw completely and pat dry for optimal results.
Do I really need to preheat?
Yes. Preheating ensures the Maillard reaction begins instantly. Without it, the chicken spends too much time in the "danger zone" where moisture evaporates before the surface can brown.
What is the best oil to use?
Avocado oil or light olive oil are ideal due to their high smoke points. Avoid extra virgin olive oil if you plan to exceed 200C, as it can break down and become bitter.