Stop settling for the soggy, lackluster output of amateur snacking. We are here to engineer the ultimate crunch, a structural masterpiece that defies the standard laws of legume physics. Most home cooks treat Oven Roasted Chickpeas as a secondary thought; they toss a can of beans into a pan and pray for a miracle. That is not how we operate. We are looking for a specific cellular transformation. We want the moisture to vacate the premise entirely, leaving behind a hollowed, golden lattice that shatters upon impact. Imagine the sound of a thousand tiny glass shards breaking in unison; that is the auditory benchmark for success. To achieve this, we must master the thermodynamics of the oven and the surface tension of high-quality lipids. We are not just making a snack; we are auditing the very essence of plant-based protein to ensure it meets our rigorous standards for texture and flavor density. Prepare for a high-velocity descent into the science of the perfect crisp.
THE DATA MATRIX
| Metric | Specification |
|---|---|
| Prep Time | 10 Minutes |
| Execution Time | 45 Minutes |
| Yield | 4 Servings |
| Complexity | 3/10 |
| Estimated Cost per Serving | $0.65 |
THE GATHERS
Ingredient Protocol:
- 425g / 15oz Canned Chickpeas (Garbanzo beans)
- 30ml / 2 tbsp Extra Virgin Olive Oil
- 5ml / 1 tsp Sea Salt
- 2.5ml / 0.5 tsp Smoked Paprika
- 1.25ml / 0.25 tsp Garlic Powder
- 0.6ml / 0.125 tsp Cayenne Pepper
Section A: Ingredient Quality Audit:
The primary failure point in this protocol is moisture retention. If your chickpeas are stored in a low-grade brine that is overly viscous, it will cling to the skin and prevent the Maillard reaction. Technical fix: Perform a triple-rinse using filtered water. If the chickpeas feel mushy out of the can, they have been over-processed in the factory; these will never achieve a true shatter-crisp. Seek out brands with firm skins. Furthermore, ensure your spices are fresh. Old paprika loses its piquant punch and becomes bitter when exposed to high thermal loads. Audit your pantry by scent; if it does not smell vibrant, discard and replace.
THE MASTERCLASS
1. The Dehydration Phase
The most critical step is removing every microliter of surface water. After rinsing, spread the chickpeas on a clean kitchen towel and roll them gently. Use a bench scraper to move them into a single layer. Let them air-dry for at least 30 minutes.
Pro Tip: Surface moisture is the enemy of the crunch. If you skip this, the water will turn to steam in the oven, creating a soft, mealy interior rather than a rendered, crispy shell.
2. The Lipid Coating
Transfer the bone-dry chickpeas to a stainless steel mixing bowl. Drizzle with the olive oil. Use a silicone spatula to fold the legumes until every single sphere is glistening. Do not add the spices yet.
Pro Tip: Using a digital scale to measure your oil ensures a perfect ratio. Too much oil leads to a greasy mouthfeel; too little prevents the heat from conducting evenly across the surface of the bean.
3. The Thermal Blast
Preheat your oven to 200C / 400F. Spread the oiled chickpeas onto a heavy-duty rimmed baking sheet. Ensure they are not crowded; they need space to aerate and allow hot air to circulate around each unit.
Pro Tip: Professional bakers use perforated pans for maximum airflow, but a standard heavy-gauge sheet pan will suffice if you do not overcrowd the surface.
4. The Seasoning Infusion
Once the chickpeas have roasted for 30 minutes and appear golden, remove the pan. Now, sprinkle your spice blend over the hot legumes. Toss them thoroughly using a saucier whisk or a spoon to ensure even distribution.
Pro Tip: Adding spices at the beginning often leads to burnt flavors. By adding them during the final 10 minutes, you infuse the oil without incinerating the delicate volatile oils in the paprika and garlic.
5. The Cooling Cure
Turn off the oven and crack the door open. Let the chickpeas sit inside for another 10 minutes as the temperature drops. This final stage pulls the last remnants of moisture from the core.
Pro Tip: This is a "carry-over" drying technique. The residual heat finishes the structural hardening without risking a surface burn.
Section B: Prep & Timing Fault-Lines:
Human error usually manifests in the "pull time." If you remove the chickpeas too early because you fear browning, you will end up with a product that goes soft within an hour. You must wait for the visual cue of a deep, burnished gold. If your oven has hot spots, rotate the pan 180 degrees at the halfway mark. Failure to do so results in a gradient of textures from "burnt" to "boiled." Use an oven thermometer to verify your appliance's internal calibration; many home ovens fluctuate by as much as 20 degrees.
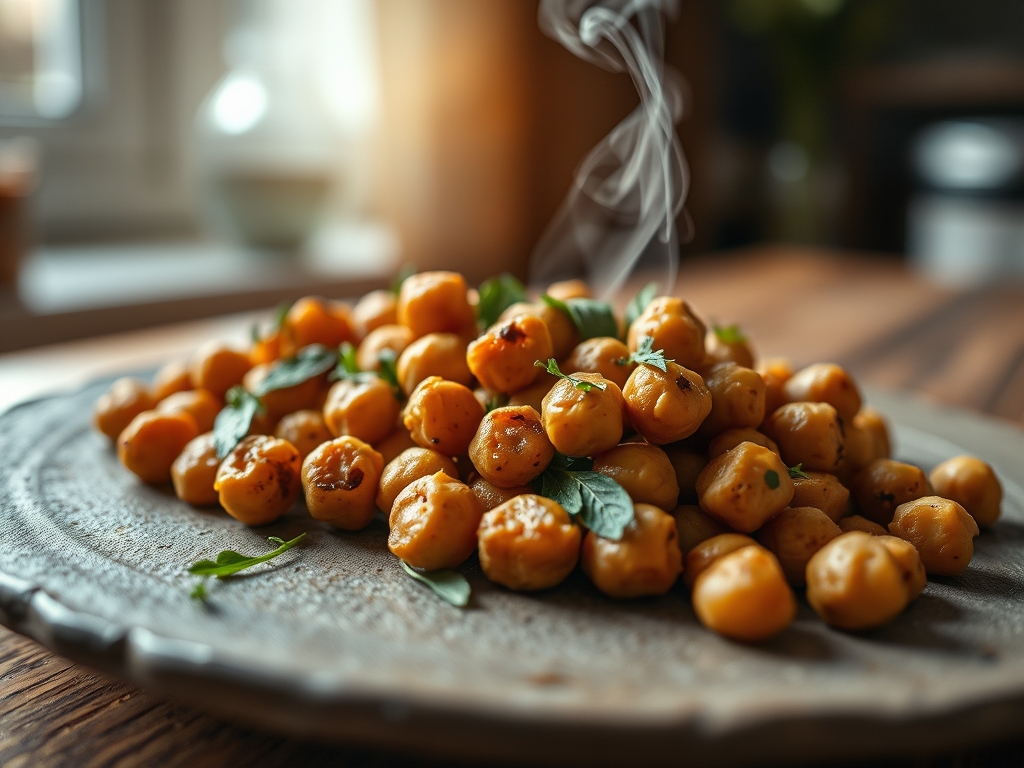
THE VISUAL SPECTRUM
Section C: Thermal & Visual Troubleshooting:
Referencing the Masterclass photo above, notice the uniform, matte-gold finish. If your Oven Roasted Chickpeas look splotchy or have dark "bruises," your oil distribution was uneven. If the skins are peeling off aggressively, you were too rough during the drying phase. The goal is a tight, translucent skin that looks like a polished gemstone. Dull, dusty-looking chickpeas indicate that the spices were applied to a dry surface; the oil must be present to act as a binding agent. If you see black specks, your spices have carbonized; reduce the temperature or add them later in the sequence.
THE DEEP DIVE
Macro Nutrition Profile
A single serving of these engineered legumes provides approximately 120 calories, 5g of fiber, and 6g of plant-based protein. The fat content is primarily monounsaturated, derived from the olive oil, which aids in the absorption of fat-soluble vitamins. It is a high-density fuel source designed for sustained cognitive output.
Dietary Swaps (Vegan/Keto/GF)
This protocol is naturally Vegan and Gluten-Free. For those on a strict Keto regimen, be advised that chickpeas contain moderate carbohydrates; however, the high fiber count lowers the net impact. To further reduce the glycemic load, ensure you do not use any sugar-based spice rubs.
Meal Prep & Reheating Science
To maintain the molecular structure and prevent the "re-entry" of atmospheric moisture, store these in a glass airtight container with a desiccant pack if possible. If they lose their snap, do not use a microwave; the radiation will agitate water molecules and cause instant softening. Instead, deglaze a pan with a drop of oil and flash-fry them for 60 seconds to restore the exterior crisp.
THE KITCHEN TABLE
Why are my chickpeas still soft in the middle?
You likely skipped the air-drying step or crowded the pan. Moisture trapped in the center needs time and space to evaporate. Ensure they are bone-dry before the oil hits them and give them room to breathe during the roast.
Can I use dried chickpeas instead of canned?
Absolutely. Soak them for 12 hours and boil until tender but firm before starting the roasting protocol. This often results in a superior "crunch" because the beans haven't been sitting in a pressurized can of liquid for months.
How long will these stay crispy?
In a humidity-controlled environment, they remain optimal for 3 to 5 days. However, in high-humidity regions, the sugars and starches will naturally attract water from the air. Keep them sealed tight to maintain the structural integrity of the snack.
What is the best way to add flavor without burning?
Always apply your dry spices during the final stage of roasting. The oil on the surface of the chickpeas will be hot enough to bloom the spices and create a flavorful coating without reaching the smoke point of the seasonings.